Ceiling Installs
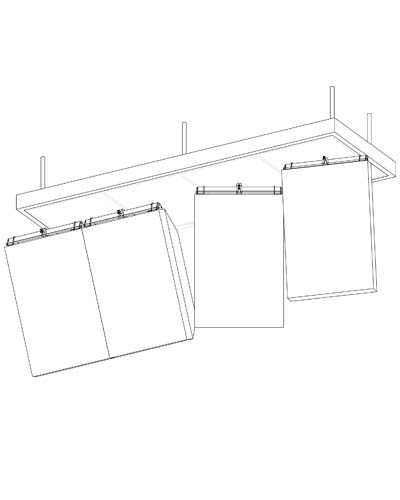
Scenario CS1
This is the most direct approach to a below ceiling array. It is a view from the house, of the House Left Array shown in scenario S6.
The difference being of course, that there was no ceiling involved in scenario S6.
The limitation of this technique is that there is no XY adjustment after the installation, short of cutting new holes thru the ceiling.
This technique provides a very clean look and its limitation is fairly easy to overcame if you know your aiming angles ±1O.
Set up a temporary lift point and suspend each speaker, one at a time, so they can be aimed at the desired angle.
Using a plumb reference point, measure the distance from the stem out to the point that will be adjacent to the next speaker.
This will allow you to calculate the relative positions of the ceiling penetrations for the stems.
Alternately, a 3D computer model of the array can be built if you have the resources. Many of the speaker manufacturers have 3D downloads of their speakers that include the center of mass. The 3/4 pipe stem of the APE Hanger™ or CHAIN Monkey™ is always located above the center of mass regardless of aiming angle.
Remember to leave a little space between each speaker for minor corrections to aiming angles.
Remember to leave a little space between each speaker for minor corrections to aiming angles.
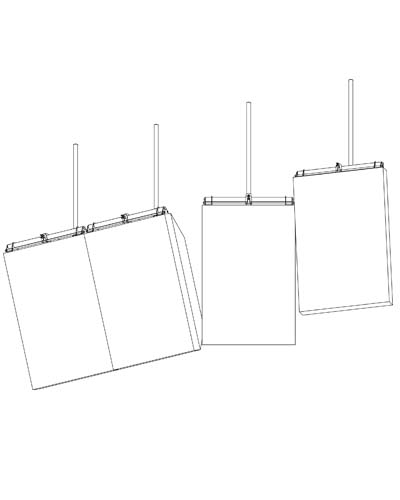
Scenario CS2
This is an example of a below ceiling array technique that retains XY adjustability of the speaker positions. It is the House Left Array shown in scenario S6. The framework being suspended is very similar but smaller. Please refer to CS3 and 4 to see how this array would look from the house with two different types of trim added to the framework.
The suspension rods are similar to those in scenario S6 but they use an eye nut to allow the assembly to be shackled to a pipe hanger. The detail above also shows a pipe enclosing part of the rod. This serves to improve the appearance of the assembly and make it more rigid. Pipe ends must be cut square so the assemblies will be perpendicular to the top of the framework. DO NOT SIDE LOAD THESE ASSEMBLIES.

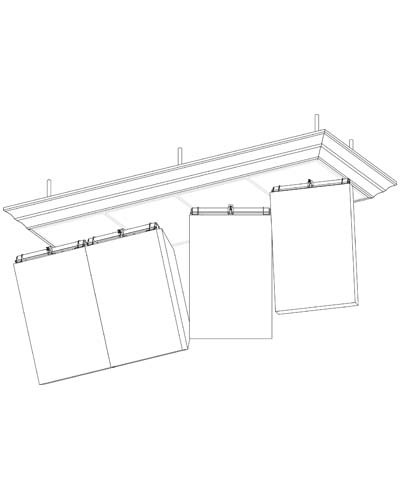
Scenario CS3
This is a view from the house, of the House Left Array in scenario CS2.
The framework has been partially enclosed, crown molding around the edges and ceiling tiles across the bottom.
This arrangement allows the speakers to be adjusted in any direction to achieve proper spacing. Once in their final positions, the ceiling tiles are positioned around the stems that suspend the speakers.
This arrangement would be indicative of an ornate or formal room into which the system is being installed. The molding used could be matched to that which is elsewhere in the room and/or color coordinated with the room. Please refer to scenario CS4 to see a less formal version of this arrangement.
Because the framework is constructed from Strut System channel such as Unistrut or B-Line, it is very easy to secure whatever trim that may be required.
For some venues, simply painting the framework would be totally satisfactory.
As with any drawing utilizing black lines on white paper, the hardware appears bolder than in real life.
With proper trim and color, this arrangement really helps large arrays blend seamlessly into the room
Scenario CS4
This is a view from the house, of the House Left Array in scenario CS2. It is a less formal version than the one shown in CS3.
The framework has been partially enclosed; wood molding, plastic laminate or metal trim around the edges and ceiling tiles across the bottom.
This arrangement allows the speakers to be adjusted in any direction to achieve proper spacing. Once in their final positions, the ceiling tiles are positioned around the stems that suspend the speakers.
Because the framework is constructed from Strut System channel such as Unistrut or B-Line, it is very easy to secure whatever trim that may be required.
For some venues, simply painting the framework would be totally satisfactory.
As with any drawing utilizing black lines on white paper, the hardware appears bolder than in real life.
With proper trim and color, this arrangement really helps large arrays blend seamlessly into the room.